DIY Pointing Brick – A Complete Guide to Restore and Protect Your Walls
A crumbling wall isn’t only spoiling curb appeal, but it also slowly corrodes the integrity of your house. When you have observed holes, cracks, and worn mortar between your bricks, you may be tempted to invite an expert. The good news is, though, that, with the correct equipment, patience, and a few instructions, you can DIY pointing brick and reuse your masonry to glory. This not only enhances the appearance of your house but will also last longer before you have to repair your brickwork, hence saving you thousands in the future.
Here, we will show you how to step-by-step assemble a DIY pointing brick, why this technique is important, what tools and materials you need, and what tips a professional would give to make this endeavor last. You may be a homeowner who wants to increase the value of your property, or you are just someone who loves the challenge of a do-it-yourself project, and this article will lead you to complete the task.
Understanding Brick Pointing and Its Importance
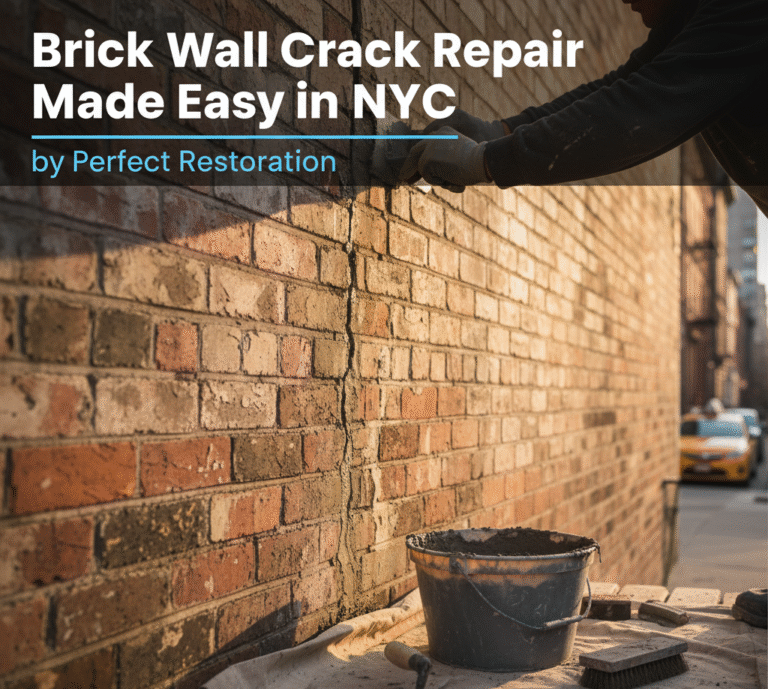
Brick pointing refers to the process of renewing and repairing the visible mortar joints on the exterior surfaces between bricks. Weather, moisture, and temperature change/wash away mortar cracks, crumbles, or are washed away. This leaves bricks exposed and the structure weak, and could even lead to leakage of water in your house.
Pointing replenishes these joints, closes up dampness, hardens the wall, and enhances the looks. In old structures in particular, pointing is very important in maintaining the original beauty and avoiding expensive structural loss. DIY pointing brick is a low-cost technique to secure your investment without making your home appear dirty.
Tools and Materials You’ll Need
Prepare in advance the appropriate tools. A prepared set of things will make your work less complicated and contribute to getting professional results. You’ll need:
- Mortar mix (select a type that corresponds to your current mortar colour and strength)
- Pointing trowel
- Mortar hawk or board
- Cold chisel and hammer
- Wire brush
- Stiff bristle brush
- Bucket and sponge
- Safety goggles and gloves
- Joint raker or grinder (old mortar removal)
The investment you will make in quality tools will save you time and will ensure your pointing job is extended.
Step-by-Step Guide to DIY Pointing Brick
Step 1: Inspect the Wall
Investigate your brickwork. Find missing, loose, or broken mortar joints. Test with a hammer, tapping gently, in case the mortar is loose, then it is time to repoint. Pay attention to those areas that are vulnerable to rain and wind because these degrade more quickly.
Step 2: Remove Old Mortar
Use a joint raker, cold chisel, or grinder to take off damaged mortar. Do not chip the bricks. Remove the old mortar to a depth of at least half an inch so the new mix can bond properly. Next, clean the joints with a wire brush so that they can be dusted off or cleaned.
Step 3: Prepare the Mortar
Blend your mortar as directed. The consistency should be like peanut butter: not too dry or too wet. Making the right ratio is important to strength and longevity. In case the color of the original mortar is possible, it would be good to match it, and this would give it a seamless appearance.
Step 4: Dampen the Joints
Wet the joints- sprinkle a little water over them, or wipe them with a little water, then smear new mortar all over. This helps the bricks not to extract too high a moisture content from the fresh mortar that may lead to the development of cracks.
Step 5: Apply New Mortar
Insert with your pointing trowel and mortar board into the joints. Begin at the top of the wall and apply it to the wall downwards to prevent smearing new joints. Shake the mortar to fit well.
Step 6: Bend and Cut the Joints.
When full, smooth and shape the joints with your trowel. It can be finished in various finishes: flush, concave, or weathered. Select one that is compatible with your current wall or preferred appearance. Only neat joints are attractive and also efficient in shedding rainwater.
Step 7: Clean Excess Mortar
Wait a little until the mortar has dried, and then remove any surplus on the faces of the bricks with a stiff brush. Wet mortar should not be smeared since it will mark the brickwork.
Step 8: Curing and Drying
Mortar takes time to cure. Keep the new work out of the rain, frost, or direct sunlight for at least 48 hours. When conditions are hot and dry, lightly spray the joints with water to prevent cracking.
Benefits of DIY Pointing Brick
Saving money is not the only one of the numerous benefits of DIY pointing brick. The first one is that it enhances the curb appeal of your home immediately, as your walls look fresh and solid.
Second, it keeps the cracks dry and keeps your property out of the gray, damp, and damaged.
Third, it makes it more energy efficient because sealed joints exclude drafts. And lastly, it will leave you the individual gratification of upkeeping and repairing your own house with your own hands.
Common Mistakes to Avoid
Numerous beginners hurry them up and get poor results. It is advisable not to mix mortar that is too wet or too dry because this will influence strength. Do not use mortar on a frosty day or on an extremely hot day- extreme temperatures disrupt bonding. Always keep joints covered since this will permit water to creep in. And lastly, and most importantly, do not grind carelessly, as that can easily spoil bricks.
Final Thoughts
DIY pointing brick is a straightforward, satisfying project that upgrades the appearance and life span of your house. The professional quality results can be obtained with the correct preparation, patience, and attention to detail without the help of an expensive contractor. The trick is to ensure you remove the old mortar in a gradual motion, apply new mortar in areas with precision, and safeguard your work as it dries.
Thus, when your walls are beginning to wear, you cannot afford to wait until the moment when the small cracks evolve into large ones. Get your tools ready, and with this guide, follow and put your own powerful weatherproof coating on your home. Whenever you repair another joint, you are not only mending bricks but saving the strength, value, and beauty of your home for many years to come.
