Pointing Brick Steps – A Complete Guide to Restoring Strength and Beauty
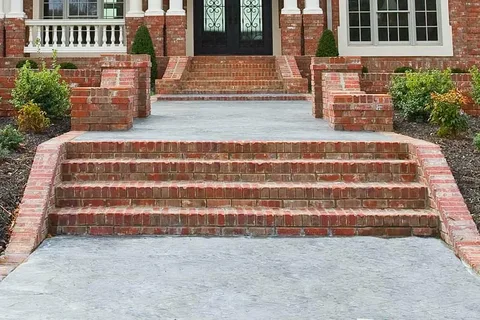
Go to a beautiful house to find that the mortar between the bricks on the front steps is crumbling, cracked, or loose. The fact that one such detail destroys that initial perception so fast. Brick steps do not only represent a route to your house; they are a symbol of love, longevity, and pride.
With time, however, the most robust of the brickwork will start wearing down. There is one more word to use, which is pointing brick steps- a restoration method that not only makes your steps firmer but also gives them their eternal beauty. This guide will give you the answers to the questions of what this thing called pointing is, why it is needed, and how to repoint your brick steps correctly to prolong their life and increase your curb appeal.
What are Pointing Brick Steps?
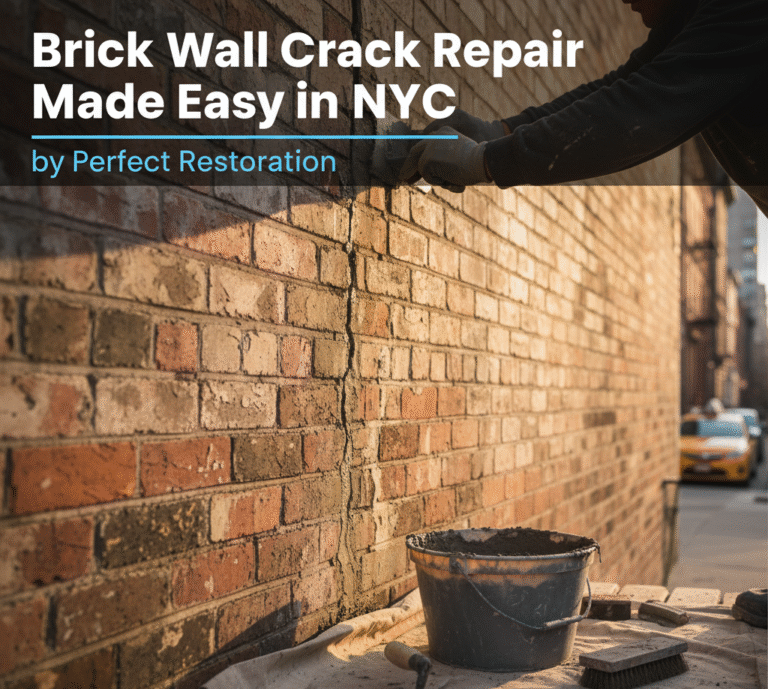
Pointing is defined as the procedure of repairing or renewing the mortar joints of bricks. Mortar is used as a bonding agent, and it keeps the bricks together and avoids the damage caused by weather and water. After years of being exposed to rain, frost, sun, and foot traffic, mortar starts to crack and crumble.
When that occurs, the water gets into the cracks, which may cause additional damage, including loose bricks, moving steps, and structural vulnerability. Repointing of brick steps also involves replacing the crumbling mortar with new mortar, which also means that you regain strength and visual appeal to the steps.
Why Repointing Brick Steps Is Important
Cracked or missing mortar might appear innocuous in the beginning, but the costs could be quite high. The largest enemy of brickwork is moisture. When mortar joints are exposed to water, they freeze and expand during low temperatures, which makes bricks lose their grip and the mortar further fractures.
In the long run, it may cause unreliable strides and even danger. Repointing is preventive maintenance to avoid water seepage, erosion, and structural integrity issues with your steps. It also increases curb appeal, making your home more appealing to visitors and potential buyers.
Signs Your Brick Steps Need Repointing
One should be familiar with when repointing is needed before getting into repairs. Some key signs include:
- Cracking, powdery, or missing mortar.
- On the steps, there are loose or wobbly bricks.
- Cavities that appear between bricks and mortar.
- Ponding or leaking of water in joints during rain.
- Stains that show moisture damage.
When you spot one or more of these symptoms, then it is high time to think of repointing before the damage escalates.
Tools and Materials Needed for Repointing
The correct tools and materials will be needed to repoint brick steps. They may include a chisel, hammer, wire brush, pointing trowel, mortar mix, bucket, sponge, and safety equipment, including gloves and goggles.
It is important to select the right mortar mix to use when repointing brick. The old mortar must be matched with new to make sure that it cannot be too hard or soft, hence long-term and flexible.
Step-by-Step Guide to Pointing Brick Steps
Some steps to repointing a brick step are complex, but it is possible with time and a proper attitude. Here’s how:
Step 1: Prepare the Surface
Start with the cleaning up of the brick steps. Wipe away dirt, dust, and loose mortar with a wire brush. In the case of old mortar, cut out all the damaged pieces with a chisel and a hammer and strike out until the joints are clear. Use a depth of approximately 1/2 inch to have the new mortar bond.
Step 2: Mix the Mortar
Use the contents of the mortar mix package and follow the instructions on blending to a smooth, easy-to-work consistency. The mortar must not be either too moist or too dry. A peanut butter type of texture is generally the best.
Step 3: Apply the New Mortar
Apply the mortar with a pointing trowel into the clean joints. You begin with the vertical joints and proceed to the horizontal ones. Make sure that the mortar is firmly packed in place to avoid air pockets.
Step 4: Rolling and Sanding the Joints.
After the mortar has started to harden but is still soft, use the trowel or a pointing tool to carve the joints. Not only does this increase the appearance, but it also makes sure that water does not accumulate in the cracks.
Step 5: Clean the Surface
Once the mortar is fairly dry, clean the excess mortar away on the faces of the bricks with a damp sponge. Wet mortar can be left behind by smearing, which can be permanent, so be careful of this.
Step 6: Allow Proper Curing
Allow the mortar to dry for a few days. It helps to keep the steps slightly wet with water spray in case of hot and dry weather, because the steps can crack during the curing process.
Common Mistakes to Avoid in Repointing
Numerous DIY homeowners commit errors that decrease the effectiveness of repointing. An improper mortar mix, a hurried curing process, and/or applying mortar to a contaminated surface may all contribute to premature failure.
The second error is the filling of surface cracks without excavating the old mortar, thus leading to weak joints. The time spent doing things correctly will guarantee long-term outcomes.
Professional vs. DIY Repointing
Repointing may be carried out as a DIY activity, though in many cases, it is more practically done by professional workers because your steps are in a very poor condition or use a special mortar.
Expertise, tools, and experience will be introduced by the professionals to make it safe and last. Conversely, DIY repointing may be cost-effective when you are assured and competent in simple masonry.
Caring for Repointed Brick Steps
When your steps have been repaired, their condition is kept regularly.
Keep them tidy, do not use harsh chemicals, and prevent the accumulation of water in the area of your house by means of good drainage.
Check the mortar joints every year, as well as taking care of small cracks before they expand to become a bigger issue.
Conclusion
Brick steps are not just a practical walkway- they symbolize the power and design of your house. But eventually, even the most well-constructed steps may become weak. With the help of pointing brick steps, restoring their reliability, beauty, and safety is achieved.
Regardless of the DIY or professional option, the only thing to do is to do it early, before the small cracks develop into a big repair. When repointed and well taken care of, your brick steps will keep on welcoming family, friends, and guests for many decades ahead.


