Tools for Brick Pointing – A Complete Guide to Get the Job Done Right
A wall is not merely strong because it is made of bricks, but is made strong because of the mortar that connects the bricks. There is no need to be someone who has passed by an old brick wall that has cracks or mortar holes to see what a silent erosion time, weather, and neglect can produce. It is here that the aspect of brick pointing (the process of replacing the mortar between the bricks) comes in. However, here is the fact that even with the right mortar mixture, without the right brick pointing tools, the task can be a mess, uneven, and temporary.
Being a DIY homeowner or a professional mason, the choice of tools that you use may be the difference between collapsing walls and decades-long walls. This guide will look at the tools that are necessary when pointing a brick, why these tools are important, and how to use the tools so that your project not only looks good, but it also lasts over time.
Why the Right Tools Matter in Brick Pointing
Building up in bricks is not only putting bricks on top of each other. As the years go by, mortar decays, cracks, or fades away, exposing your wall to moisture and structural failure. Repointing brick is an inexpensive method of rebuilding strength and beauty in the brick; however, applying the wrong tool may destroy the brick, spread the mortar unevenly, or not compact the mortar down. That is why it is necessary to invest in the appropriate brick repointing tools to be sure of accuracy, reliability, and minimal dust.
Essential Tools Needed for Brick Pointing
1. Pointing Trowel
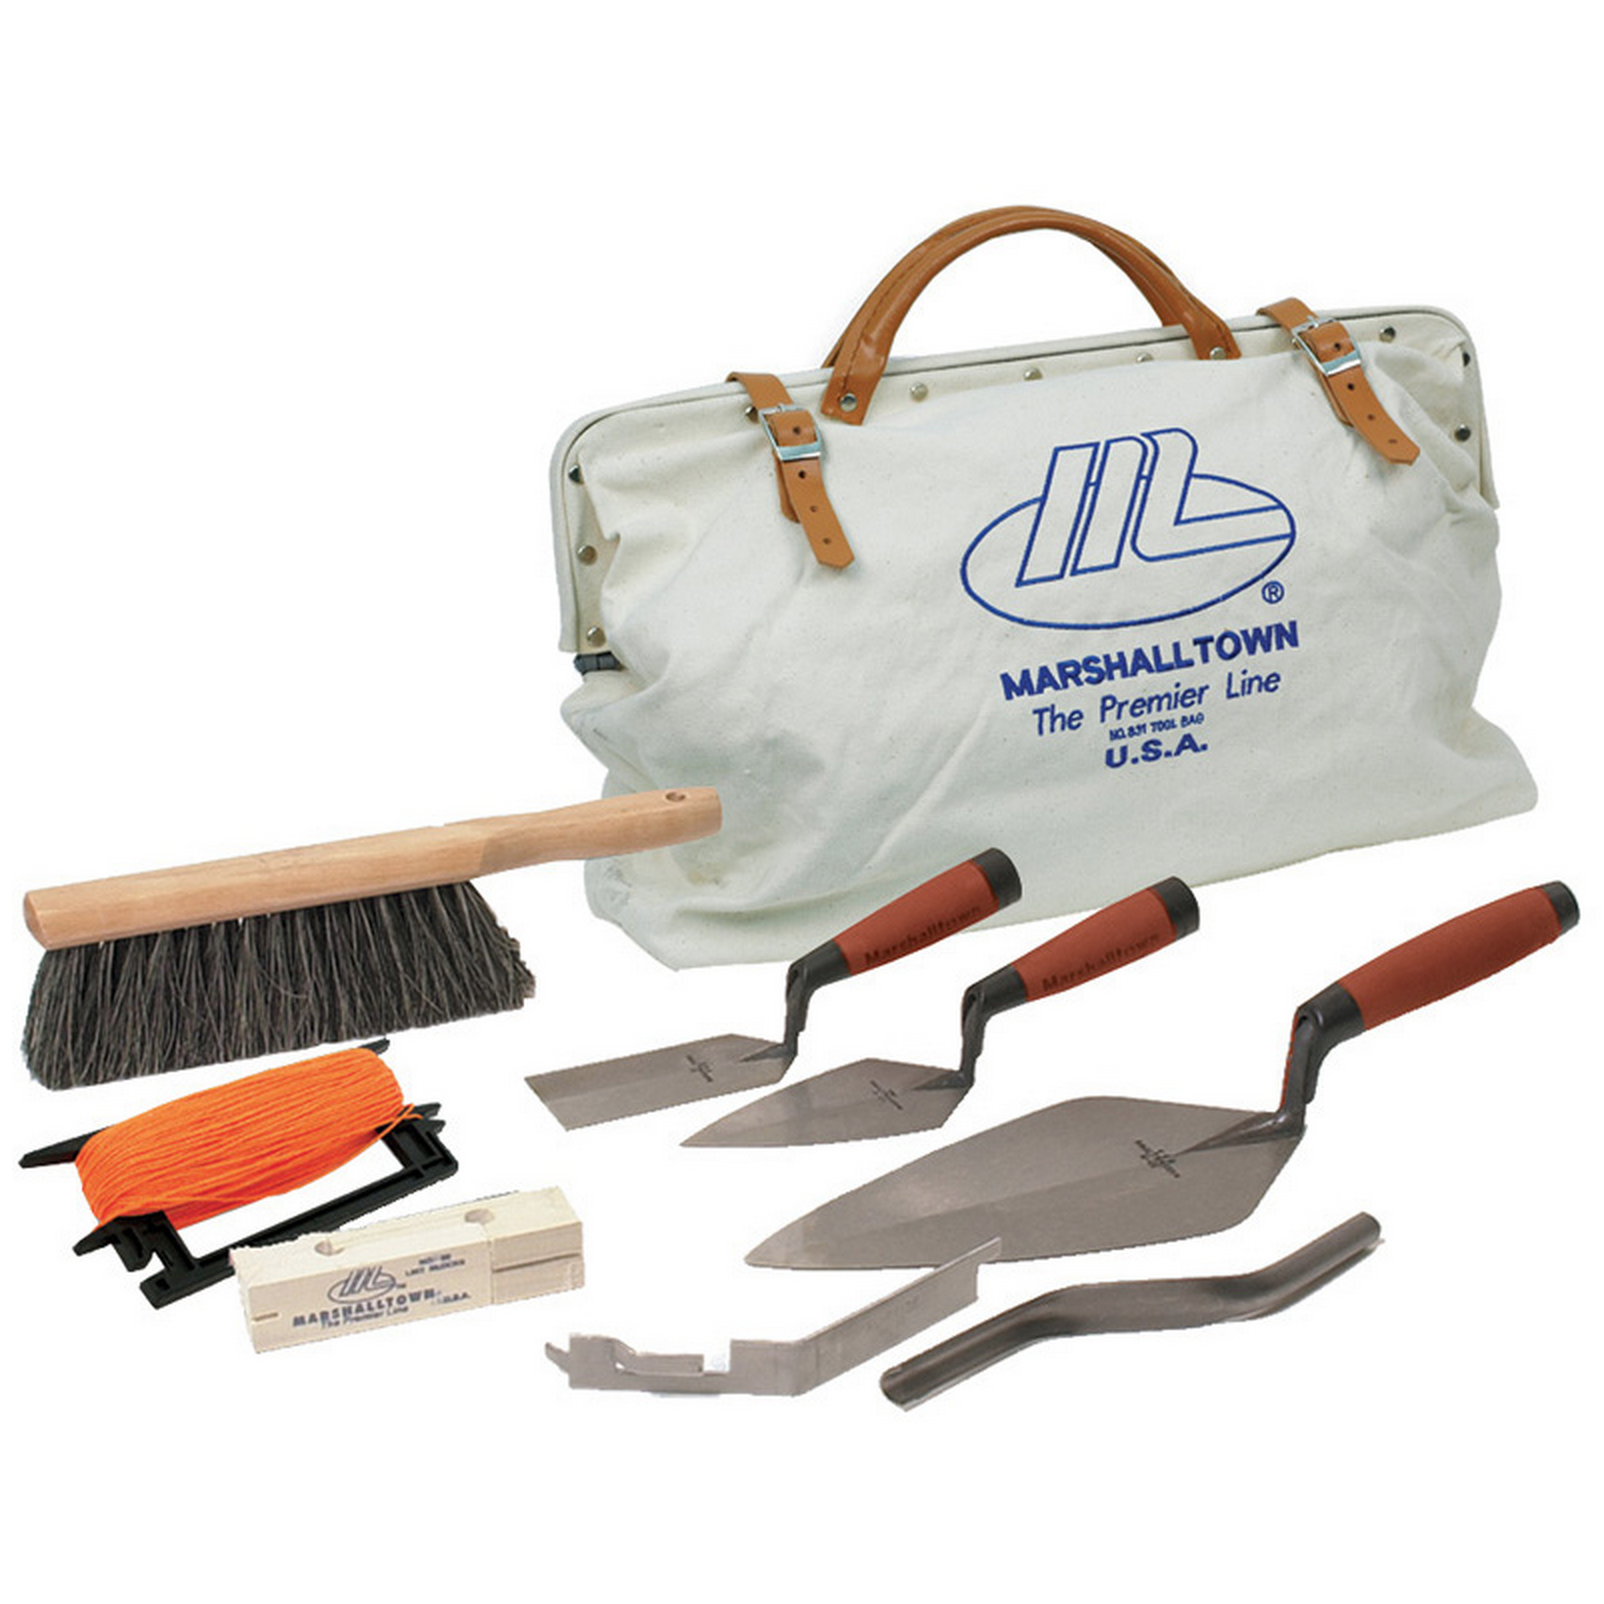
The star of the show of a repointing project is the pointing trowel. It is a small, triangular instrument to be used in applying mortar directly into a joint. A fine pointing trowel gives you accuracy so that you can press the mortar into the crevices without dripping on the faces of the bricks. Trowels with a comfortable grip and balanced weight are preferred by professionals, as repetitive motions of a large project become easier.
2. Mortar Hawk or Mortar Board
Working with fresh mortar that is wet, you will have to use a flat surface to support it. Here, the mortar hawk or board comes in. Mortar hawk is a small, portable platform that enables you to conveniently carry and apply mortar without much trouble. It eliminates you going back and forth to the mixing area, wasting time, and continues with your workflow.
3. Joint Raker
Removal of old mortar must be done before new mortar can be applied. A joint rake is used with a specific design to remove the crumbly mortar in between the bricks. Its adjustable wheels and hardened steel blades make the joints clear to the correct depth without breaking up any adjacent brick.
4. Chisels and Hammers
Where mortar is particularly stubborn, chisels and hammers will be used. An instrument called a pa lugging chisel, specifically, is thin enough to extract mortar in a crevice. These are used to provide you with the ability to remove old mortar without cracking or chipping the faces of the bricks.
5. Mortar Gun
In bigger projects, the time and effort can be saved with the help of a mortar gun. Like a caulking gun, it lets you inject mortar into joints fast and on target. It is especially handy for pointing long runs of brickwork, making sure that it is applied uniformly.
6. Brick Jointer
Once mortar has been laid, it should be pressed and moulded into shape to give it strength as well as a good look. A jointer of bricks fits the face of mortar joints, making a smooth face. Jointers can be of different shapes (flat, concave, and V-shaped) to adapt the original character of the wall or to adopt a new one.
7. Wire Brush
Cleaning as much as pointing is important. Debris, dust, and crumbling mortar are removed by a heavy wire brush, and then new mortar is applied. It also makes cleaning the face of the brick after pointing easier in order to maintain a sharp and professional finish on your wall.
8. Bucket and Mixing Tools
No tool can rescue the project without well-mixed mortar. Use buckets, mixing paddles, or even a small cement mixer to make sure your mortar is of the correct consistency. Mortar is available as smooth with no lumps and is simpler to work with and bond between the bricks.
Supporting Tools That Make the Job Easier
In addition to the key pointing tools, there are some support tools that allow making the process safer and more efficient. Higher walls require a strong ladder or scaffolding. Dust mask, safety goggles, and gloves are used as protection against the flying debris and dust in the process of mortar removal. Lastly, a garden sprayer or a spray bottle is used to wet the joints, then new mortar can be put on before the joints dry out, and it can cure properly.
Step-by-Step Use of Tools in Repointing
It is important to use these tools as much as to possess them. The old mortar is removed by the joint raker, chisel, and hammer first.
A wire brush then removes dust and debris. Mortar is made and applied to the hawk once the joints are prepared. Mortar is applied using a pointing trowel or mortar gun into the joints.
The mortar is next compressed and levelled with the brick jointer to get its finish. When all this is done, the brush is used to remove any excess mortar to give it a clean look.
Common Mistakes to Avoid with Brick Pointing Tools
Another error that has been common is the utilization of improvised tools rather than the use of the right brick pointing tools, which, in most cases, results in the mortar being uneven or damaging the bricks.
The second mistake is not cleaning the joints before the new mortar is applied, which does not allow proper bonding. Another kind of problem that may cause both the longevity and the aesthetics of your wall is overfilling or underfilling joints. These issues are prevented by using the appropriate tool at the right stage and ensuring professional completion.
Final Thoughts
Brick pointing might be an easy process, yet it is a skill that has to be based on the correct equipment. Along with such basic tools as a pointing trowel, additional equipment such as jointers and brushes will be used to obtain a long-lasting and appealing result. To house owners, it is worth investing in quality tools so that the wall can withstand weather and time. To professionals, it translates to quicker work, contented customers, and enduring outcomes.
The thing is that, when restoring your brickwork, you must keep in mind that the tools do not simply simplify the task; what they do is enable you to do the task correctly. Having the right tools, your brick wall can be as beautiful and strong as ever for generations to come.
